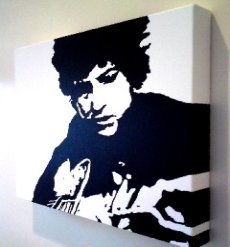
Pop Art Lesson PlansAll you need to teach the perfect popart lesson...Teach the perfect pop art lesson every time with this simple plan... This guide is written for students and teachers alike, the Pop Art lesson plan can be used to create great pop art every time, using what you probably have on your computers already - nothing more complicated than microsoft word to edit photos and a whole load of black paint. I have done this many times (with children as young as 6 and teachers as old as 65!!) teachers and students have always really enjoyed it. Resources: Computer (with word or more poweful image editing software) Black and white paint Pencil OHP (optional but really helps - an interactive whiteboard, or any electronic projector will do though). Plan... 1) Choose an image on computer that has quite high dark and light shades, people work best, but this is not limited... 2) Copy image into Word and use the picture editor tool to change image to black and white, or greyscale. Adjust brightness and contrast on the image once selected until you are happy with the edit. If it does not look 'good' then you may need to try a different image, or use a more powerful image editor like revelation natural art, photoshop etc... 3) Enlarge the picture to half A4 and print it, or you could leave it on the computer and connect to an Overhead projector (modern) or photocopy on the OHT and project up onto a wall. 4) Place canvas or paper under projection and project image. Draw around outline and label dark and light areas with a D or an L. Make sure all lines are traced. 5) Remove canvas or support and paint in the dark areas, leave the light ones, or paint in white. 6) Finish by rubbing out pencil lines and covering in a strong acrylic coat. 7) Sign paintings and enjoy the sight, you will be the envy of all you know! If you have any questions just email using contact us... Good luck! Why not guide your students to this website so they can explore the world of pop art?
|

